It’s their first impression, and it happens in a split second. What does yours say about you? If the answer is "not professional enough," you're not alone. Many people struggle to get a high-quality headshot without hiring an expensive photographer. The good news is, you don't need one. You can create a polished, professional headshot from a simple selfie using AI.
Getting that perfect look involves more than just a good smile. It's about clarity, lighting, and focus. Often, a selfie has a distracting background or isn't quite sharp enough for a professional platform. This is where AI tools come in, making complex edits simple. For instance, you can instantly improve the quality of your image with a Photo Enhancer. This kind of tool can fix blurriness, correct colors, and sharpen details, turning a casual photo into a crisp and clear headshot.
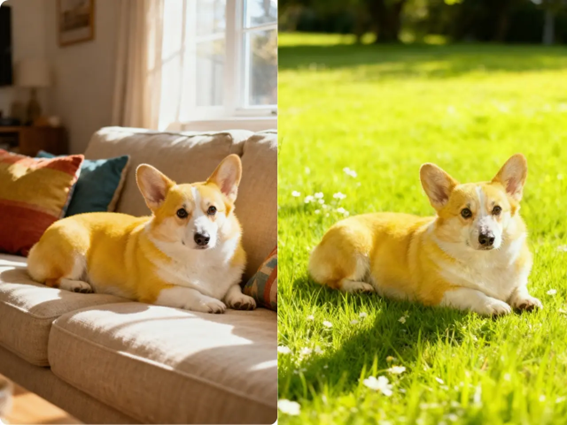
Another common selfie problem is a cluttered or unprofessional background. Maybe you took a great picture in your living room, but the bookshelf and family photos behind you don't exactly scream "business." Instead of trying to crop it out awkwardly, you can use a specialized tool to replace it completely. A high-quality Background Remover can instantly isolate you from the original setting. From there, you can add a simple, neutral background like a solid gray, white, or a subtle office blur to give your photo a corporate feel.
Why Your LinkedIn Photo Is More Important Than You Think
In a sea of millions of profiles, your headshot is your anchor. It’s a powerful tool for building trust and credibility. Profiles with professional photos get significantly more views, connection requests, and messages. Think of it as part of your personal brand. A clear, friendly, and professional image makes you seem more approachable and competent.
On the other hand, a low-quality photo, or no photo at all, can be a red flag for recruiters and potential collaborators. It might suggest a lack of effort or a profile that isn't actively managed. A selfie from a party, a cropped group photo, or a picture that's blurry and dark sends the wrong message. It says you're not taking your professional presence seriously. Using AI to refine a selfie is the perfect solution, giving you a top-tier result without the cost and hassle of a photoshoot.
Step-by-Step: Turning Your Selfie into a Headshot
Creating a professional headshot with AI is straightforward. You don’t need any technical photo editing skills. Just follow this simple process.
Step 1: Choose the Right Selfie
The AI can work wonders, but it needs a good starting point. Go through your camera roll and find a selfie with the following qualities:
* Good Lighting: Look for a photo taken in natural light, facing a window if possible. Avoid harsh overhead lighting that creates unflattering shadows.
* Simple Background: While you can remove the background later, a less cluttered starting point makes the AI's job easier. A plain wall is ideal.
* Clear Focus: Your face should be sharp and in focus. The AI can enhance sharpness but can't fix a completely blurry image.
* Appropriate Expression: Choose a photo where you look friendly and confident. A slight, natural smile is almost always the best choice. Look directly at the camera to create a connection with the viewer.
* High Resolution: Use the original, high-resolution file. Avoid using pictures sent through messaging apps, which often compress and reduce quality.
Step 2: Enhance and Upscale Your Image
Once you've chosen your best selfie, the first edit is to improve its overall quality. This is where an AI photo enhancer becomes essential. These tools analyze your photo for flaws and automatically correct them.
Upload your selfie to the enhancer. The AI will typically perform several actions in seconds:
* Sharpen Details: It will refine the focus on your eyes, hair, and facial features.
* Correct Lighting and Color: It adjusts brightness, contrast, and color balance to make the photo look more professional and vibrant.
* Reduce Noise: It smooths out any graininess or "noise" from the image, which is common in photos taken in low light.
The result is a photo that looks like it was taken with a much better camera. The details are crisp, and the lighting looks balanced and intentional.
Step 3: Remove and Replace the Background
With your photo enhanced, the next step is to handle the background. A professional headshot should have no distractions. You want the focus to be entirely on you.
Using an AI background remover is the easiest way to achieve this. Upload your enhanced photo, and the tool will automatically detect you and separate you from the background. The precision of modern AI means it can handle tricky details like individual strands of hair.
After the background is gone, you have a blank slate. You can now add a new one. For a LinkedIn headshot, stick to simple and professional options:
* Solid Colors: White, light gray, or dark gray are classic, safe choices.
* Subtle Gradients: A gentle gradient can add a bit of depth without being distracting.
* Blurred Office: A slightly blurred image of a modern office space is another popular and effective option.
Choose a background that complements your attire and doesn't clash with the colors in the photo. The goal is a clean, professional look.
Step 4: Final Touches and Cropping
Your photo is almost ready. The last step is to crop it for LinkedIn. The platform uses a circular frame for profile pictures, so you need to make sure your face is centered and properly framed.
* Crop to a Square: Start by cropping the image into a 1:1 square aspect ratio.
* Center Your Face: Position your head in the middle of the frame. A good rule of thumb is to have your eyes about one-third of the way down from the top of the image.
* Leave Some Headroom: Don't crop too tightly. Leave a little space above your head and on the sides. The standard headshot framing includes your head and the top of your shoulders.
Once you’re happy with the crop, save the final version. You now have a professional-quality headshot ready to upload to your LinkedIn profile.
Common Mistakes to Avoid
When creating your AI headshot, steer clear of these common pitfalls:
* Over-Editing: While AI tools are powerful, don't go overboard. Avoid filters that dramatically change your appearance. You want to look like yourself. The goal is enhancement, not alteration.
* Choosing an Unprofessional Outfit: Select a selfie where you're wearing what you might wear to work or an interview. A simple collared shirt, blouse, or blazer is always a good choice. Avoid t-shirts with logos, busy patterns, or casual wear.
* Forgetting to Smile: A serious expression can come across as unapproachable. A warm, genuine smile makes you seem more open and trustworthy.
* Using an Outdated Photo: Your headshot should be a recent representation of you. Using a photo that is more than a few years old can be misleading.
By transforming a simple selfie, you're taking control of your professional narrative. You’re presenting a polished, confident version of yourself to the world, and you’re doing it without spending a dime on a professional photographer. In today's competitive digital landscape, that’s a powerful advantage.


